DOMANDA sensore arduino con codice per altro modello di sensore

amicoentity303

Utente Attivo
176
18
CPU
Intel Core i7-10700KF
Dissipatore
Be Quiet! BK021
Scheda Madre
Z490-PLUS
HDD
970 EVO Plus
RAM
Patriot Viper
GPU
GIGABYTE RTX 3060 Ti 8Gb
PSU
Seasonic FOCUS GX-650
Case
DeepCool Matrexx 55 Mesh
Periferiche
Cooler Master MasterKeys CK350
OS
Windows 10 Pro
salve a tutti, io ho trovato un progetto per arduino di un robottino mangiarifiuti questo, solo che ho notato che il codice di arduino usa un altro tipo di sensore, il problema è che non so come posso modificare il codice per farlo funzionare con il sensore hc-sr04, qui sotto lascio il codice


Codice:
// Welcome to the source code of "Hungry Robot"

// YouTube Instruction
// 3d printer version: https://youtu.be/KfP_LfUiwdc
// paper version: https://youtu.be/3qnU8uD0utM

// Documentation
// https://eunchan.me/Hungry-Robot-1bac36202aae469e806f882e0308ce18

// Select Arduino nano / ATmega328P (Old Bootloader)

// in order to use servo motor, we need to include a library file
#include <Servo.h>

// let's make an instance of Servo
Servo armServo;

// this function automatically runs only once when the Arduino's power up
void setup() {

  // we use pin number 12 for control the robot.
  armServo.attach(12);
  // move the motor to default angle
  armServo.write(90);

  // pin A7 is for the distance sensor
  pinMode(A7, INPUT);

  // these 3 pins (pin0, pin1, pin13) are for turning on LEDs
  // Arduino nano already has 3 LEDs on these pins.
  pinMode(13, OUTPUT);
  pinMode(0, OUTPUT);
  pinMode(1, OUTPUT);
}

// in order to check coming hand,
// we will keep the sensor value these variables
int sensorValue = 0;
int prevSensorValue = 0;

// When the sensor value is hight than the THRESHOLD value,
// The code will call action();
const int THRESHOLD = 360;

void loop() {

  // read A7's analog value and asign the value into sensorValue
  sensorValue = analogRead(A7);

  // these two lines means that some object has come
  // from outside of Threshold to inside of it.
  if (prevSensorValue <= THRESHOLD) {
    if (sensorValue > THRESHOLD) {
      // It's time to action
      action();
    }
  }

  // regardless the action, save current sensor value prevSensorValue
  // so that we can check the direction
  prevSensorValue = sensorValue;

  // this delay controls how often this loop is running
  // without this delay, this loop runs too fast
  // then, the differences between previous and current sensor value
  // can not be meaningful.
  delay(10);
}


void action() {
  // call this function for turning on three LEDs all together
  led(true);

  // eating sequence
  // wait 1000ms (1 second)
  delay(1000);

  // let's use pin12 for motor control
  armServo.attach(12);
  // let's move the motor to degree '10' (move the arm up)
  armServo.write(10);

  // wait 300 ms
  delay(300);

  // let's move the motor to degree '70' (move the arm down)
  armServo.write(70);
  delay(500);

  // after ate
  delay(100);
  armServo.write(50);
  delay(250);
  armServo.write(70);
  delay(250);
  armServo.write(50);
  delay(250);
  armServo.write(70);
  delay(250);
  armServo.write(50);
  delay(250);
  armServo.write(70);
  delay(250);
  armServo.write(50);
  delay(250);
  armServo.write(90);
  delay(250);

  // release arm's torque
  armServo.detach();

  // call this function for turning off three LEDs all together
  led(false);
}

void led(bool onOff) {
  // pin 13's LED turns on when it is high
  // pin 0, 1's LED turn on when it is low
  if (onOff) {
    digitalWrite(13, HIGH);
    digitalWrite(0, LOW);
    digitalWrite(1, LOW);
  } else {
    digitalWrite(13, LOW);
    digitalWrite(0, HIGH);
    digitalWrite(1, HIGH);
  }
}
 

bigendian

Utente Attivo
749
432
OS
Linux
Ho dato un occhiata veloce, ma hc-sr04 sembra ben piu complesso da gestire. Dal codice sopra tu leggi da un ingresso analogico. hc-sr04 invece restituisce un impulso la cui lunghezza, da processare, e' proporzionale alla distanza.

In arduino in genere pochi si avventurano a reimplementare la lettura, c'e' gia tutta la pappa pronta.


Chiama dist() per la distanza
 

amicoentity303

Utente Attivo
176
18
CPU
Intel Core i7-10700KF
Dissipatore
Be Quiet! BK021
Scheda Madre
Z490-PLUS
HDD
970 EVO Plus
RAM
Patriot Viper
GPU
GIGABYTE RTX 3060 Ti 8Gb
PSU
Seasonic FOCUS GX-650
Case
DeepCool Matrexx 55 Mesh
Periferiche
Cooler Master MasterKeys CK350
OS
Windows 10 Pro
Ho dato un occhiata veloce, ma hc-sr04 sembra ben piu complesso da gestire. Dal codice sopra tu leggi da un ingresso analogico. hc-sr04 invece restituisce un impulso la cui lunghezza, da processare, e' proporzionale alla distanza.

In arduino in genere pochi si avventurano a reimplementare la lettura, c'e' gia tutta la pappa pronta.


Chiama dist() per la distanza
il problema è che non dove mettere tutto quel codice, ho provato in alcuni modi ma quando vado a fare la verifica da arduino mi da un pò di problemi
 

sp3ctrum

Amministratore
Staff Forum
16,014
7,857
CPU
AMD Ryzen 5 3900X
Dissipatore
Scythe Mugen 5 rev.b Push&Pull
Scheda Madre
ASUS TUF Gaming B550M-Plus WIFI
HDD
Nvme Samsung EVO 1Tb + SSD Samsung evo 850 250gb + Toshiba P300 3Tb
RAM
HyperX FURY 16gb 3200Mhz
GPU
ASUS Dual GeForce RTX 4070 OC White Edition 12GB GDDR6X
Audio
Topping DX3 Pro + Focusrite Scarlett 2i2 + Mackie MR524 + Beyer DT 770 Pro + Presonus SubWoofer
Monitor
LG Ultragear 27gp850
PSU
Corsair RM850x 80 PLUS Gold
Case
Thermaltake V200 RGB
Net
Vodafone 1000Mb
OS
Windows 11 Pro
Hai attivato tutte le librerie che ti servono?

Quel robottino usa anche il servomotore e non lo hai incluso nelle librerie
Inoltre che errore ti da il compilatore?
 
Ultima modifica:

amicoentity303

Utente Attivo
176
18
CPU
Intel Core i7-10700KF
Dissipatore
Be Quiet! BK021
Scheda Madre
Z490-PLUS
HDD
970 EVO Plus
RAM
Patriot Viper
GPU
GIGABYTE RTX 3060 Ti 8Gb
PSU
Seasonic FOCUS GX-650
Case
DeepCool Matrexx 55 Mesh
Periferiche
Cooler Master MasterKeys CK350
OS
Windows 10 Pro
Hai attivato tutte le librerie che ti servono?

Quel robottino usa anche il servomotore e non lo hai incluso nelle librerie
Inoltre che errore ti da il compilatore?
si, le librerie che servono sono tutte attive, è solo che il codice non so dove metterlo, ho provato così ed esce questo errore:
Arduino:1.8.19 (Windows 10), Scheda:"Arduino Nano, ATmega328P"

C:\Users\andrea\Desktop\sketch_may07a\sketch_may07a.ino: In function 'void setup()':

sketch_may07a:28:7: error: 'HCSR04' has not been declared

void HCSR04::init(int out, int echo[], int n)

^~~~~~

sketch_may07a:28:19: error: qualified-id in declaration before '(' token

void HCSR04::init(int out, int echo[], int n)

^

sketch_may07a:37:1: error: 'HCSR04' has not been declared

HCSR04::HCSR04(int out, int echo) { this->init(out, new int[1]{echo}, 1); }

^~~~~~

sketch_may07a:37:16: error: expected primary-expression before 'int'

HCSR04::HCSR04(int out, int echo) { this->init(out, new int[1]{echo}, 1); }

^~~

sketch_may07a:37:25: error: expected primary-expression before 'int'

HCSR04::HCSR04(int out, int echo) { this->init(out, new int[1]{echo}, 1); }

^~~

sketch_may07a:38:1: error: 'HCSR04' has not been declared

HCSR04::HCSR04(int out, int echo[], int n) { this->init(out, echo, n); }

^~~~~~

sketch_may07a:38:16: error: expected primary-expression before 'int'

HCSR04::HCSR04(int out, int echo[], int n) { this->init(out, echo, n); }

^~~

sketch_may07a:38:25: error: expected primary-expression before 'int'

HCSR04::HCSR04(int out, int echo[], int n) { this->init(out, echo, n); }

^~~

sketch_may07a:38:37: error: expected primary-expression before 'int'

HCSR04::HCSR04(int out, int echo[], int n) { this->init(out, echo, n); }

^~~

sketch_may07a:39:1: error: 'HCSR04' was not declared in this scope

HCSR04::~HCSR04()

^~~~~~

C:\Users\andrea\Desktop\sketch_may07a\sketch_may07a.ino:39:1: note: suggested alternative: 'UCSR0A'

HCSR04::~HCSR04()

^~~~~~

UCSR0A

sketch_may07a:47:7: error: 'HCSR04' is not a class, namespace, or enumeration

float HCSR04::dist(int n) const

^~~~~~

sketch_may07a:47:19: error: qualified-id in declaration before '(' token

float HCSR04::dist(int n) const

^

sketch_may07a:59:7: error: 'HCSR04' is not a class, namespace, or enumeration

float HCSR04::dist() const { return this->dist(0); }

^~~~~~

sketch_may07a:59:19: error: qualified-id in declaration before '(' token

float HCSR04::dist() const { return this->dist(0); }

^

exit status 1

'HCSR04' has not been declared

Questo report potrebbe essere più ricco di informazioni abilitando l'opzione
"Mostra un output dettagliato durante la compilazione"
in "File -> Impostazioni"

Codice:
// Welcome to the source code of "Hungry Robot"

// YouTube Instruction
// 3d printer version: https://youtu.be/KfP_LfUiwdc
// paper version: https://youtu.be/3qnU8uD0utM

// Documentation
// https://eunchan.me/Hungry-Robot-1bac36202aae469e806f882e0308ce18

// Select Arduino nano / ATmega328P (Old Bootloader)

// in order to use servo motor, we need to include a library file
#include <Servo.h>
#include "HCSR04.h"

// let's make an instance of Servo
Servo armServo;

// this function automatically runs only once when the Arduino's power up
void setup() {

  // we use pin number 12 for control the robot.
  armServo.attach(12);
  // move the motor to default angle
  armServo.write(90);

  // pin A7 is for the distance sensor
 void HCSR04::init(int out, int echo[], int n)
{
 this->out = out;
  this->echo = echo;
  this->n = n;
  pinMode(this->out, OUTPUT);
  for (int i = 0; i < n; i++)
    pinMode(this->echo[i], INPUT);
}
HCSR04::HCSR04(int out, int echo) { this->init(out, new int[1]{echo}, 1); }
HCSR04::HCSR04(int out, int echo[], int n) { this->init(out, echo, n); }
HCSR04::~HCSR04()
{
  ~this->out;
  delete[] this->echo;
  ~this->n;
}

///////////////////////////////////////////////////dist
float HCSR04::dist(int n) const
{
  digitalWrite(this->out, LOW);
  delayMicroseconds(2);
  digitalWrite(this->out, HIGH);
  delayMicroseconds(10);
  digitalWrite(this->out, LOW);
  noInterrupts();
  float d = pulseIn(this->echo[n], HIGH, 23529.4); // max sensor dist ~4m
  interrupts();
  return d / 58.8235;
}
float HCSR04::dist() const { return this->dist(0); }

  // this delay controls how often this loop is running
  // without this delay, this loop runs too fast
  // then, the differences between previous and current sensor value
  // can not be meaningful.
  delay(10);
}


void action() {
  // call this function for turning on three LEDs all together
  led(true);

  // eating sequence
  // wait 1000ms (1 second)
  delay(1000);

  // let's use pin12 for motor control
  armServo.attach(12);
  // let's move the motor to degree '10' (move the arm up)
  armServo.write(10);

  // wait 300 ms
  delay(300);

  // let's move the motor to degree '70' (move the arm down)
  armServo.write(70);
  delay(500);

  // after ate
  delay(100);
  armServo.write(50);
  delay(250);
  armServo.write(70);
  delay(250);
  armServo.write(50);
  delay(250);
  armServo.write(70);
  delay(250);
  armServo.write(50);
  delay(250);
  armServo.write(70);
  delay(250);
  armServo.write(50);
  delay(250);
  armServo.write(90);
  delay(250);

  // release arm's torque
  armServo.detach();

  // call this function for turning off three LEDs all together
  led(false);
}

void led(bool onOff) {
  // pin 13's LED turns on when it is high
  // pin 0, 1's LED turn on when it is low
  if (onOff) {
    digitalWrite(13, HIGH);
    digitalWrite(0, LOW);
    digitalWrite(1, LOW);
  } else {
    digitalWrite(13, LOW);
    digitalWrite(0, HIGH);
    digitalWrite(1, HIGH);
  }
}
 
Ultima modifica da un moderatore:

sp3ctrum

Amministratore
Staff Forum
16,014
7,857
CPU
AMD Ryzen 5 3900X
Dissipatore
Scythe Mugen 5 rev.b Push&Pull
Scheda Madre
ASUS TUF Gaming B550M-Plus WIFI
HDD
Nvme Samsung EVO 1Tb + SSD Samsung evo 850 250gb + Toshiba P300 3Tb
RAM
HyperX FURY 16gb 3200Mhz
GPU
ASUS Dual GeForce RTX 4070 OC White Edition 12GB GDDR6X
Audio
Topping DX3 Pro + Focusrite Scarlett 2i2 + Mackie MR524 + Beyer DT 770 Pro + Presonus SubWoofer
Monitor
LG Ultragear 27gp850
PSU
Corsair RM850x 80 PLUS Gold
Case
Thermaltake V200 RGB
Net
Vodafone 1000Mb
OS
Windows 11 Pro
La prossima volta se devi copiare cose lunghe usa lo spoiler o la funzione codice.

Cmq ti dice che non hai dichiarato HCSHCSR04

Nel codice che hai messo tu non hai attivato la libreria.

Cosa significa che non sai dove mettere il codice?
 

amicoentity303

Utente Attivo
176
18
CPU
Intel Core i7-10700KF
Dissipatore
Be Quiet! BK021
Scheda Madre
Z490-PLUS
HDD
970 EVO Plus
RAM
Patriot Viper
GPU
GIGABYTE RTX 3060 Ti 8Gb
PSU
Seasonic FOCUS GX-650
Case
DeepCool Matrexx 55 Mesh
Periferiche
Cooler Master MasterKeys CK350
OS
Windows 10 Pro
La prossima volta se devi copiare cose lunghe usa lo spoiler o la funzione codice.

Cmq ti dice che non hai dichiarato HCSHCSR04

Nel codice che hai messo tu non hai attivato la libreria.

Cosa significa che non sai dove mettere il codice?
ah ok, allora la prossima volta userò lo spoiler, ho provato con tutte le librerie che ci sono per quel sensore e continua a darmi lo stesso errore, poi su dove non so mettere il codice intendo fino a quale riga devo sostituire
 

sp3ctrum

Amministratore
Staff Forum
16,014
7,857
CPU
AMD Ryzen 5 3900X
Dissipatore
Scythe Mugen 5 rev.b Push&Pull
Scheda Madre
ASUS TUF Gaming B550M-Plus WIFI
HDD
Nvme Samsung EVO 1Tb + SSD Samsung evo 850 250gb + Toshiba P300 3Tb
RAM
HyperX FURY 16gb 3200Mhz
GPU
ASUS Dual GeForce RTX 4070 OC White Edition 12GB GDDR6X
Audio
Topping DX3 Pro + Focusrite Scarlett 2i2 + Mackie MR524 + Beyer DT 770 Pro + Presonus SubWoofer
Monitor
LG Ultragear 27gp850
PSU
Corsair RM850x 80 PLUS Gold
Case
Thermaltake V200 RGB
Net
Vodafone 1000Mb
OS
Windows 11 Pro
Hai fatto copia incolla da un sito?
Che sito é?
 

amicoentity303

Utente Attivo
176
18
CPU
Intel Core i7-10700KF
Dissipatore
Be Quiet! BK021
Scheda Madre
Z490-PLUS
HDD
970 EVO Plus
RAM
Patriot Viper
GPU
GIGABYTE RTX 3060 Ti 8Gb
PSU
Seasonic FOCUS GX-650
Case
DeepCool Matrexx 55 Mesh
Periferiche
Cooler Master MasterKeys CK350
OS
Windows 10 Pro

sp3ctrum

Amministratore
Staff Forum
16,014
7,857
CPU
AMD Ryzen 5 3900X
Dissipatore
Scythe Mugen 5 rev.b Push&Pull
Scheda Madre
ASUS TUF Gaming B550M-Plus WIFI
HDD
Nvme Samsung EVO 1Tb + SSD Samsung evo 850 250gb + Toshiba P300 3Tb
RAM
HyperX FURY 16gb 3200Mhz
GPU
ASUS Dual GeForce RTX 4070 OC White Edition 12GB GDDR6X
Audio
Topping DX3 Pro + Focusrite Scarlett 2i2 + Mackie MR524 + Beyer DT 770 Pro + Presonus SubWoofer
Monitor
LG Ultragear 27gp850
PSU
Corsair RM850x 80 PLUS Gold
Case
Thermaltake V200 RGB
Net
Vodafone 1000Mb
OS
Windows 11 Pro
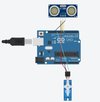
Da quanto ho capito, il sensore é di tipo On-Off che triggera il pin e attiva il servo, come hai fatto i collegamenti?
In teoria dovrebbe funzionare il codice originale, hai provato?

Screenshot_3.jpg
 

amicoentity303

Utente Attivo
176
18
CPU
Intel Core i7-10700KF
Dissipatore
Be Quiet! BK021
Scheda Madre
Z490-PLUS
HDD
970 EVO Plus
RAM
Patriot Viper
GPU
GIGABYTE RTX 3060 Ti 8Gb
PSU
Seasonic FOCUS GX-650
Case
DeepCool Matrexx 55 Mesh
Periferiche
Cooler Master MasterKeys CK350
OS
Windows 10 Pro
Da quanto ho capito, il sensore é di tipo On-Off che triggera il pin e attiva il servo, come hai fatto i collegamenti?
In teoria dovrebbe funzionare il codice originale, hai provato?

Visualizza allegato 433386
sono sicuro di averlo fatto con arduino nano, e sembrava che funzionasse solo il motorino, però l'altra sera era molto tardi e non so come ho fuso un arduino nano, adesso non so se il sensore e il motorino ne hanno risentito
 

sp3ctrum

Amministratore
Staff Forum
16,014
7,857
CPU
AMD Ryzen 5 3900X
Dissipatore
Scythe Mugen 5 rev.b Push&Pull
Scheda Madre
ASUS TUF Gaming B550M-Plus WIFI
HDD
Nvme Samsung EVO 1Tb + SSD Samsung evo 850 250gb + Toshiba P300 3Tb
RAM
HyperX FURY 16gb 3200Mhz
GPU
ASUS Dual GeForce RTX 4070 OC White Edition 12GB GDDR6X
Audio
Topping DX3 Pro + Focusrite Scarlett 2i2 + Mackie MR524 + Beyer DT 770 Pro + Presonus SubWoofer
Monitor
LG Ultragear 27gp850
PSU
Corsair RM850x 80 PLUS Gold
Case
Thermaltake V200 RGB
Net
Vodafone 1000Mb
OS
Windows 11 Pro
Scusa, ma non ci sto capendo piú nulla...
che codice hai usato?
Ti funzionava?
E poi cosa é successo?
 

amicoentity303

Utente Attivo
176
18
CPU
Intel Core i7-10700KF
Dissipatore
Be Quiet! BK021
Scheda Madre
Z490-PLUS
HDD
970 EVO Plus
RAM
Patriot Viper
GPU
GIGABYTE RTX 3060 Ti 8Gb
PSU
Seasonic FOCUS GX-650
Case
DeepCool Matrexx 55 Mesh
Periferiche
Cooler Master MasterKeys CK350
OS
Windows 10 Pro
Scusa, ma non ci sto capendo piú nulla...
che codice hai usato?
Ti funzionava?
E poi cosa é successo?
allora, all'inizio ho usato questo codice su arduino nano dove il braccio funzionava correttamente ed il sensore sembrava non andare, poi mentre ero sulla breadboard mi è scivolato un cavetto non so dove ed arduino nano ha iniziato a fumare, adesso non so se magari quella specie di corto circuito mi ha fuso anche il sensore ed il motorino, al massimo provo a comprare il motorino ed il sensore
 

sp3ctrum

Amministratore
Staff Forum
16,014
7,857
CPU
AMD Ryzen 5 3900X
Dissipatore
Scythe Mugen 5 rev.b Push&Pull
Scheda Madre
ASUS TUF Gaming B550M-Plus WIFI
HDD
Nvme Samsung EVO 1Tb + SSD Samsung evo 850 250gb + Toshiba P300 3Tb
RAM
HyperX FURY 16gb 3200Mhz
GPU
ASUS Dual GeForce RTX 4070 OC White Edition 12GB GDDR6X
Audio
Topping DX3 Pro + Focusrite Scarlett 2i2 + Mackie MR524 + Beyer DT 770 Pro + Presonus SubWoofer
Monitor
LG Ultragear 27gp850
PSU
Corsair RM850x 80 PLUS Gold
Case
Thermaltake V200 RGB
Net
Vodafone 1000Mb
OS
Windows 11 Pro
Mi sa che hai fuso Arduino, se lo colleghi al pc, comunica?
 

amicoentity303

Utente Attivo
176
18
CPU
Intel Core i7-10700KF
Dissipatore
Be Quiet! BK021
Scheda Madre
Z490-PLUS
HDD
970 EVO Plus
RAM
Patriot Viper
GPU
GIGABYTE RTX 3060 Ti 8Gb
PSU
Seasonic FOCUS GX-650
Case
DeepCool Matrexx 55 Mesh
Periferiche
Cooler Master MasterKeys CK350
OS
Windows 10 Pro
Mi sa che hai fuso Arduino, se lo colleghi al pc, comunica?
scusa mi sono dimenticato di dirti che ne ho un altro, comunque quello "fuso" sembra che comunichi
 

Entra

oppure Accedi utilizzando
Discord Ufficiale Entra ora!

Discussioni Simili